Cooking the Books (or, Baking My MacBook Pro Logic Board)
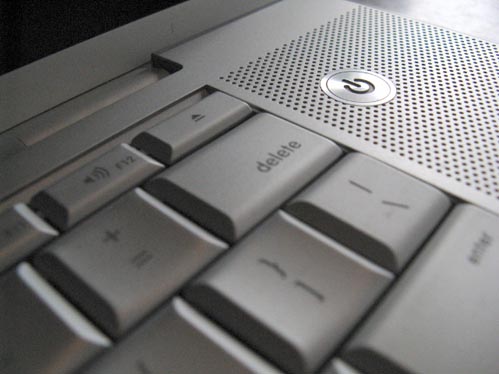
Well, it’s taken me a little while to get this post up—not to mention the fact that its taken me a long while to get any posts up—but I thought this one was worth it just as an encouragement for anyone else who might be dealing with a fried MacBook Pro logic board that is out of the AppleCare warranty coverage. I also needed to get this post up before I forgot most of the details.
As a little background, I put my MBP (17″ 2.5GHz-early 2008, Model A1261 to be exact for you that are searching) to sleep by closing it up for the night, which I’ve done for the past 2+ years with no problems. The next morning I noticed that the glowing power light on the latch release was off and thought it strange and then went to open and wake it and nothing happened. After futilely trying to wake it by varying degrees of banging on random keys and quickly pressing the power button I waited several minutes before I committed to powering it down. After powering it down, I tried to start it back up. While I could hear the hard drive spin up and the optical drive go through its start-up whirrings, there was no start-up chime and no effort to display anything on screen. I tried all the start-up key combinations to start in safe-mode, reset PRAM, start diagnosis—nothing worked. Tried to insert original system install disk and boot from that, all to no avail.
After going through the Apple Support boards, I could not determine a culprit and since there are no Apple Stores closer than the 330 miles to Seattle yet (soon in Spokane I hear), I resorted to taking my system to the only certified Apple Repair shop in Spokane. We were hoping that it would fall under the Nvidia Graphics chip issue so that Apple would cover the replacement (note to self: on future MacBook Pro purchases: Get the full three-year AppleCare coverage!). Since the system would not even get past the initial boot phases, there was no way to even diagnose any other problems. Which AppleCare concluded that it would not fall under the Nvidia replacement program. Which that meant it would be in the neighborhood of $1000-1200 to replace logic board ($800 logic board + labor)—which is not much less than the $1200-1400 my system in good condition was going for on ebay. I’ve since gathered the necessary courage (and tools) to do it myself, so I could save the labor charges in the future. I also found a resource that I might consider as well if I had to face the issue of replacing the logic board again; DT&T Service claims they can replace my model logic board with a refurb for $450. Maybe next time…
I was faced with trying to sell the dead MBP on Craigslist or ebay whole for $600 or try to recover more by dismantling it out and selling the parts on ebay and maybe be able to make up to $800. I determined that the time and effort involved in managing that many auctions wasn’t worth it and posted it on Craigslist. I got exactly two calls on it—one by one of the techs at the shop who diagnosed it originally to ask if I’d ruled-out the Nvidia issue (doh!) and the other by a guy who was tempted to buy it to try to fix it, but just didn’t have the time—he asked if I had considered “baking the logic board”. He quickly countered my skepticism with a plea to Google the term and that I’d find a plethora of advice on how to do it. (Update: when I wrote this, I couldn’t find the contact info for him but just recently found it. Here’s his link: http://www.spokanepcrepair.com/) So I did and he was right-there’s a bunch of crazy gamers out there resurrecting dead graphics cards, Xboxes and logic boards.
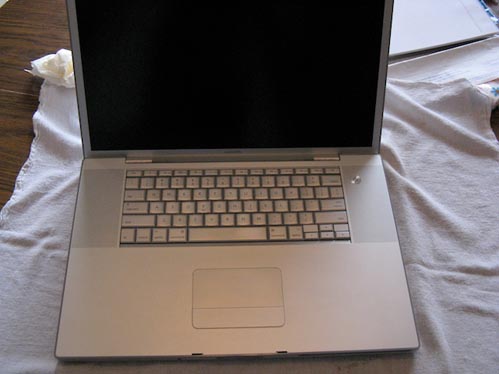
I’ve never been afraid to get under the hood and swap out RAM, replace a hard drive or optical drive, but removing the logic board from an expensive laptop (at least when it was bought), was a little beyond my comfort zone. Figuring I had nothing to lose if I messed up the logic board I found some helpful videos on YouTube that showed how to disassemble my MBP and remove the logic board. After running out to get a better selection of Torx screwdrivers, I found this video helpful (with the exception of the backing music):
After successfully removing the logic board, I then proceeded to prep it for inserting it into the oven. Now if getting into the guts of a $3K+ computer doesn’t make you nervous enough, then actually taking the most important and expensive element out and sticking it into an oven should do the trick. One of the things that nobody covered very carefully, was how much of the additional plastic parts should be removed before inserting into the oven. I was initially fearful after reading several posts where the user would actually remove ANYTHING that was plastic and re-solder it back on afterwards. I wasn’t really committed or prepared to do that. I was most nervous about the USB, DVI and Firewire ports because there was no way I was going to be able to remove those and put them back on. I concluded that they have to be made up of at least heat-resistant plastics, and I hadn’t read or seen anything that lamented melted ports and that I should be OK.
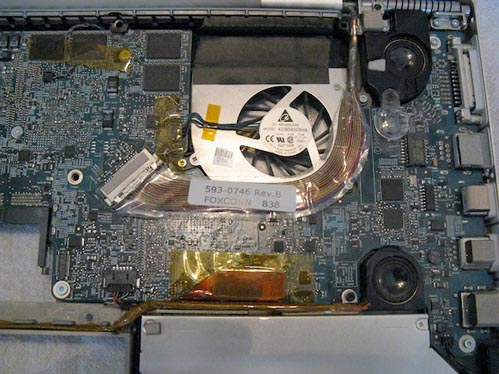
I was careful to remove a piece of foam cushioning that is attached to the board and placed it back on afterward.
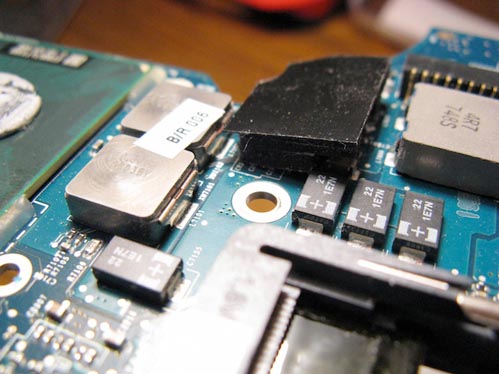
Here it is after I removed the foam piece:
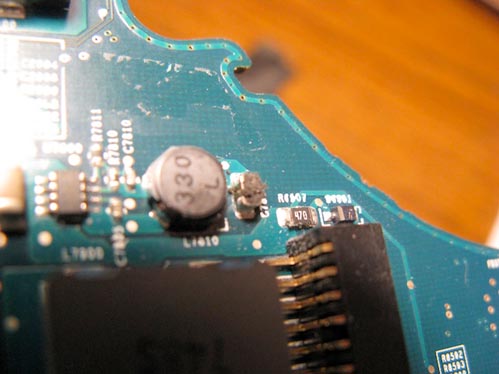
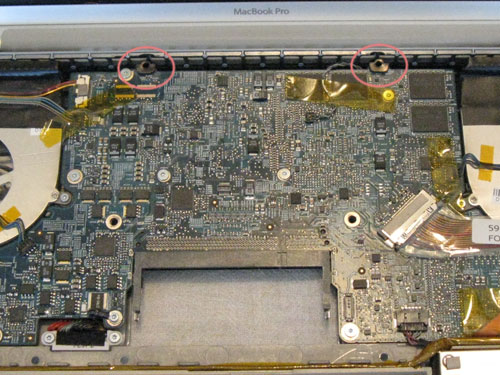
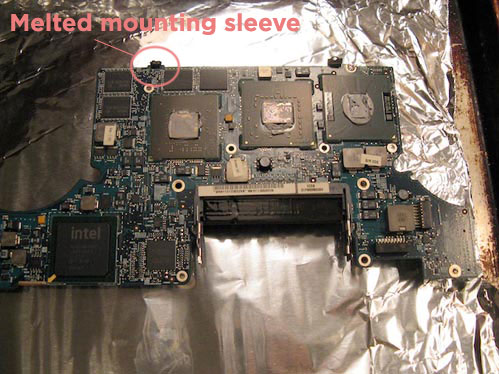
One thing (actually two) that I did not think to remove were the two sleeves for mounting screws that are located at the top of the board (see circled areas in image below). I thought they were metal, but they turned out to be not-so-heat-resistant plastic and I unfortunately learned that lesson the hard way. They are no longer the best part of the securing system of my logic board. I managed to recover one, but the other was toast.
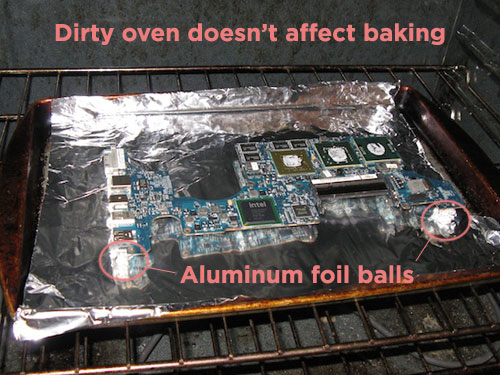
The instructions I followed for baking came mostly from this post on Overclockers. I preheated my oven to 375° F (helpful marital tip: coordinate with spouse if attempting to do this anywhere close to dinner time—trust me on this). I placed the board on rolled-up balls of foil (not sure why—just doing what I saw in the other pics) on top of cookie sheet covered with foil (to catch the grease drippings, or melted plastics I suppose—thankfully there was neither).

Time to take a deep breath… At this point, it should be noted that we actually gathered the whole family around to pray for God’s mercy and that He might bless this endeavor in that it was affecting my ability to provide for the said whole family. It was time to start baking…
After reading through numerous posts (well over 20 or so) about different temperatures and times to bake for, I settled on 7m:30s at 375°F for these two reasons: one is that most of the realistic sounding posts hovered between 7 and 8 minutes so I thought 7:30 should do it. And the other was after reading several posts that 375° would be sufficient to soften the soldering joints to just barely the melting point allowing them to reseat better and where anything over 400°F would melt the soldering too much—along with all the other plastics and burn the stickers.
It’s not easy holding your breath for over 7 minutes, but with prayer, we persevered (it was a family event at this point). After letting the board cool for about 10 minutes (I think “rest” is the proper cooking terminology), it was now time to start on the process of putting the board back in the case.
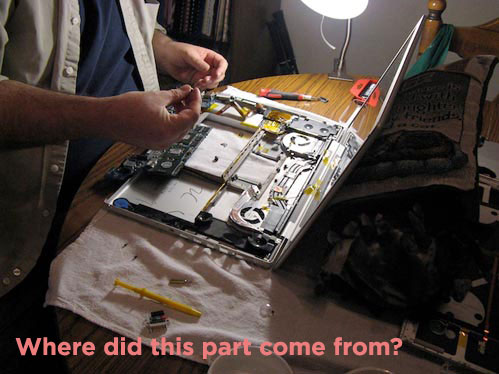
One thing that helped immensely in the re-assembly process was that I took pictures with my digital camera of all the critical assembly points so that I could reconstruct it all back together to the original condition. With the exception of the oft-pointed out melting of the mounting screw sleeves, everything went back together smoothly and with all the family gathered around (actually they were out watching a movie because it was pretty boring watch me put the machine back together) to hear the delightful start-up chime and watch the screen flicker to life and post a question mark because I hadn’t put the original hard drive back in. But that question mark was a beautiful thing, because it meant that it was alive and looking for a suitable, bootable drive. I had removed the hard drive and placed it in an external enclosure so that I could access it from my older system to at least be able to get some work done and also to initially rule out that it was a hard drive issue. I wasn’t worried about losing my data, as I use Apple’s Time Machine and had my drive backed-up. Putting the hard drive back in was fairly quick to do, and after that was in, the system booted up beautifully.
Well, I don’t have any pics or video of it coming to life but suffice it to say, that I’m typing this post on it and have been working on it happily for the last (almost) 30 days and thankful to the Lord in showing His mercy. I’ve read that there are no long-term guarantees with this fix and to not expect it to last forever. How long that turns out to be, I’ll be sure to post in the future, but I’m taking the precaution of planning for its imminent replacement (hoping my system doesn’t take that last statement personally).
There does seem to be a casualty after the baking in that since I’ve made the fix, it looks like I lost one of my USB ports on the left side closest to the power plug. It provides power to the device, but the device (both input and disk) is not recognized. That and the fact that I had to re-enter all my passwords as once the board’s battery is disconnected, the OS X Password Keychain is wiped. So, that’s a bummer, but well worth the trade-off of having a working system back.
If I could recommend anything to anyone in the future of how to prepare before an event like this happens is, in addition to keeping your drives backed up (at least with Time Machine), is to have a good password manager with all your passwords stored—specially if you have multiple email accounts and website accounts in Dreamweaver that you manage.
And finally, be sure to give a hearty and heart-felt thanks to a gracious Lord who has shown us mercy indeed! Hallelujah!
(Update on Aug. 24, 2011: After hearing of so many success stories of others inspired by this article and baking my MBP six times [five more times after this article], one of the important steps that I did not perform during this bake and therefore did not include in this article is to be sure to clean the old thermal paste off of the processors and the corresponding heat sinks. And then to re-apply a quality thermal paste to the processors and heat sinks. The first five bakes lasted for various durations between one month and four with the average being two to three months before having the problem again. Each time, I failed to clean the old and apply new thermal paste. On the sixth bake, I finally did that and have not had to bake again since Feb 24, 2011 [exactly 6 months so far]. I have detailed this in my post: My MBP is Officially Hexed—But There’s Hope, please read that in addition to this post before baking. Also, as of today, I have counted a total of at least 22 people who have successfully cooked their books and posted back on one of the “Baking the Books” articles—so hopefully, that will give you hope.)


Reflowed my 2008 15″ pro today and it works perfectly! Still had my photoshop file from a year ago open when I turned it back on. Crazy!
I successfully baked my macbook pro logic board yesterday. The laptop was not doing anything besides spinning the fans up, and the front light was on.
Went to an AASP cause I thought it might be the Nvidia problem, but they told me it was the logic board in general. Not willing to pay 700 euros for a new board I started looking around and found some people telling they successfully baked their logic board. Since the laptop was already broken I thought “why not give it a try?!”.
So, yesterday I took it apart, set the oven to preheat (200 degrees Celcius) and baked the board for 7 minutes. After putting it back together… it works again!!
Great!
Thanks for you detailed story!
Followed your instructions exactly on my bricked A1260. Worked perfectly! Amazing. Thanks so much for the detailed instructions. Only modifications I made were to cover the ports end of the board with foil, and re-did thermal paste with a generous helping.
Well, the fix lasted just under 1 month. Just re-baked and am up and running again. Am going to try to get Apple to recognize an Nvidia problem this time (didn’t try last time).
Followed every step and it worked perfectly….. but then I noticed that my power adapter is not being recognized… so once my battery died my laptop wont stat again… anybody else had the same issue?
When you put the logic board back in, did you reconnect the power cable to the board? It’s underneath the board when you fit it in, so you might have forgotten about it.
It’s step 21 here;
http://www.ifixit.com/Guide/MacBook-Pro-15-Inch-Core-2-Duo-Models-A1226-and-A1260-Logic-Board-Replacement/681/7
Hi!!!
Same problem here!
Put it in the oven….cooked at 200º Celsius for 7 and a half minutes and…guess what….it works!!!!!! My macbook pro is back in business!!!!
Thanks a million!!!!
Greetings from PORTUGAL!!!!
It worked!!!! Friends gave me their MBP because of the black screen and dead keyboard etc, i searched for some well known issues, contacted Applecare and offcourse Applecare didn’t care anymore even though it was their fault. Then I found your page, scratched my head and thought ‘errr…. why not?’ My friends looked really suspicious at me but finally let me use their oven and indeed those were a hard and nervous what-the-heck-am-i-doing 7.30 minutes to wait but then reassembled it and it just went all ‘wunnnnggggggg’ on me!!
the only thing is now that the harddisk format is changed to ‘Microsoft Basic Data’ , i know you can use gDisk to change that but my host computer (firewire connected to the MBP) has tiger and so can’t run that, but at the moment that’s just details, the main thing is that it’s working again, big thanks! 🙂
I just wanted to say thank you for giving me the info & courage to perform this on my beloved 15′ MBP (which I am posting this message from).
Peace
jonnycuba
I had the same problem. I followed you and now I’m writing through my macbook pro! Thanks! It works!
Hi,
great inspiration to try this!! Can I ask, what longevity does this give? What is the longest you have heard the bake has enabled a MBP to continue?
For me, six months was the longest I was able to get a bake to last. Shortest was two weeks which was when I finally started applying new thermal paste–next bake was the six month bake. Not bad. Now I’m working with a replaced logic board that Apple finally replaced for free.
Hi Russell,
Your guide is very easy to understand and it’s great to see how you succeeded with the fix despite your previous experience being limited to RAM changes!
One thing I have noticed you said though is that you eventually got a new logic board from Apple. How? I have visited two Apple Stores here in the UK and they want to charge me for it.
Thanks,
Nick
The last time I brought it in, it coincided with the first iOS update I had done on my new (at the time) iPhone 4S which actually wiped out stored photos and notes and temporarily bricked my phone–so I wasn’t a happy customer on two fronts. They were able to get my phone situation all settled pretty quickly, but I let them know (once again, but respectfully) that I was not happy with the way things were working out on my MBP and the iPhone, so I think I finally struck a sympathetic chord with the Genius I was working with. He decided to go ahead an put it it in for a whole logic board replacement at no charge. And that was after trying to get it to fail/pass the Nvidia test for like the fifth time with no success again. It was gone for five days, which was a bummer, but it came back working like a charm and has been running ever since. This was last November (2011).
* A GOOD RE-BAKE AND REPAIR SHOULD LAST 4 OR 5 MONTHS *
My 2007 MacBook failed in Jan 2012. By following the advice from Russell I repaired it early March 2012 and it failed again early August 2012. Thanks to Russell I learned from his early mistakes and applied Arctic Silver on my first fix.
Just baked my MBP (2007) and it worked perfectly! Thanks for the info. I found this link link text useful for taking the laptop apart.
Baked my 15″ MPB (2007) a couple of weeks ago: worked like a charm and haven’t had any problems since.
Hello Russell, I do not get the thermal paste. So do I clean the old thermal off from the processor and heat sink first and then put it in the oven to be baked or do I clean off the old thermal first and apply new thermal on and then bake it? Do I have to put any on afterwards? What kind of thermal is it, or does it really matter?
Here is the post where I described how I applied the Thermal Paste and what type: My MBP is Officially Hexed—But There’s Hope!
Just to let everyone know. I just did this. Followed directions from ifixit.com for tear down and then followed baking directions from here. It worked like a charm.
Hi, Russel,
My MPB has the typical symptoms. I will bake it by your instructions. 190C, 7:30 min.
I have not another way. Ok!
But I’ve just a question. Do you know, why comes back the Logic board of death under high-temp-handling?
And a little notes. My MBP’s legs was broken before the machine stopped.
Maybe the cooling? Just an idea…
l
Thanks for your help and I will report when the project will be ready.
Csaba from Hungary
My 15″ MBP (2008) died last year in March. I finished making a flyer and then closed the screen and it went to sleep and never woke up until this past Saturday. About a month ago by God’s generosity I came across your site. I remember soon after my computer “died” I brought it to Apple and asked them to do the Nvidia test and they were saying that that wasn’t the issue and that my logic board was dead. I never bough the Apple Care (bad move) so I couldn’t get it fixed for free. To get my stuff off the harddrive and get a new logic board with like a 90 day warranty or something like that was going to cost me a couple hundred dollars which I did not have. When I read about this method on your site I got tools together and started to take it apart. There was this one stripped screw so I had to get special tools and a power drill to get it out. I stalled on the process cause subconsciously I was thinking “what if it doesn’t work?”. I didn’t want my hopes to get crushed. This Saturday I finally buckled down and just did it and prayed that it would work. It crazyyyyyyyyyyyyyyyyyyyyyyyyyy….my computer turned on just as I left it. I accidently broke the connector for the regular battery, the PRAM battery, (and then I got hip and figured out how to properly remove the connectors) and lost some screws but all in all I can’t complain. I also managed to melt the mounting sleeves even though you pointed this out in your post. 😛 Thank you soooooooo much for posting this! 😀 I’m typing this comment from my revived laptop…it’s kind of surreal using it over a year later. I definitely thought it was a goner.
Just baked my MacBook Pro for 8mins @ 385. I cleaned the heat sinks and processors before baking and applied Artic Silver 5 before reassembling. System booted like a charm. Thanks!
Thank you for the help, because of this info my friends MAcBook now is up and running smoothly again.YouROCK!!!
Hey man thank you for this awesome tutorial, it worked 3 times on our macbook pro.
But now he is dead, it got us an extra year on a 5 year old machine.
Its a great story everytime,”Did you try to bake your mac?” 🙂
Grtz from Europe
That’s great. 5 years isn’t too bad for most computers–even though it should be longer for Apple products.
I think that ship has sailed…In my company we bought a lot of macbooks in the past, all the same story by apple: “to expensive to repair, by a new one” :s
The new macbook pro’s with retina are getting my blood boiled (everything is glued together, no repair possible)
Was a big apple enthusiast before they went low entry commercial, its not worth the price tag anymore…we are migrating to HP Z series and lenovo.
Hi there, looking to bake my logic board…but noticed I have a fan forced oven verse most videos which tend to have the older style oven with the heat rail at the bottom. Will this effect the process? Do i need to change the temperature or will it work just the same?
Any oppinions would be appreciated. Thanks
Hi,
Thanks a lot for this post. My MBP 17″ (2007) failed and I thought he was dead… I baked the mother-board (8 min. at 190°C) and he works fine again…
Amazing.
Many thanks.
Just completed the third bake in one year. First two were at the recommended 7:30 @ 375. This one was at 8:0 @ 380.
I must admit that this site was well done and was the guide that I have used for each bake. The quote for replacing a 3yr 1 month old in Bermuda was $ 1400.
It must be stated that I will likely never purchase another Apple product. This is obviously a manufacturing/design defect. Had Apple covered the motherboard I would have felt that they stood behind their product and would have gladly replaced this machine with another MacBook Pro at 5 years.
Just for the record, the computer belongs to my wife (email, photos, surfing, etc.) I am an IT manager of a shop of around 80 users. When my opinion is asked concerning home computers, Apple does not fare well.
Thank you again for a well made and useful website.
You are a life saver! My sister gave me her old MacBook Pro (2009) which died second time. First time Apple fixed for around $600, second time she just didn’t want to pay them again. I was going to sell it for scrap, but then found places in the NYC that supposedly revive logic boards for around $270 (I’m sure they just bake it as well). Fortunately before I took it to one of those places I stumbled upon your article, and actually baked my logic board as suggested. Amazingly it worked! Been running for second day, no major issues. Got RAM errors twice (maybe RAM slot changed it’s shape) but after re-seating RAM it works so far 🙂 MacBook does get very hot on the bottom, and I can’t hear Fans running, but it might be normal since I never had Mac before. I installed Fan monitor app and it shows that they are running so I assume they just very quiet 🙂 Thanks again man!
Hi,
Great piece, I think I’ll be doing this in the next couple of days. I cleverly bought a macbook pro off ebay unaware of this problem with this model and its now toast. Power light and disk spins up but nothing else.
My one question is how has this hack lasted? it’s been over 2 years now? Is it still good?
Cheers,
Simon.
Sorry for the delay in replying, but my MBP was in Apple Repair and out of service for 3 weeks for some other unrelated repairs but I’ll include it in a new post that follows up on the status of my MBP.
Hi Russell 🙂 could you tell me if baking the logic board will change its color or something?
I mean, can someone could tell that the board has been baked just by looking at it?
Thanks for posting this great info 🙂
Hi I have a mid 2010 macbook pro. One day I turned it on and everything started up fine but my backlight wasnt working…long story short, was told it was the logic board so did as instructed and baked for 7.5 minutes but still no luck. Still turning on fine and plugged to an external monitor works perfect.
Anyone have any cheap suggestions?
Great article, quick question – what did you use to clean off the old thermal paste?
I’ve used a professional demulsifier, but found isopropyl alcohol wipes to be just as effective. Just be sure to use a clean one often. You’ll see your processor looks like glass once it’s been completely cleaned.
http://m.youtube.com/watch?v=XFNcycBMXAo
do you know if this works on motherboards that had spill damage? my girl friends sister spilled wine on her macbook pro and it is currently being use as living room decor. =P
I’ve read that this process works because the heat “re-melts” the broken beads, therefore creating a new connection with the GPU. Think of it as a broken candle. You can melt both ends again and fuse them back together. It won’t end up as strong as the original bond, but should stand for a while.
Thank you so much for this. Add me to the list of people this worked for. I would like to understand more why the board failed to begin with though.
man this work like a charm follow you instructions and now my mac works better than when i got it. Thank you dude you save me.
I just baked my logic board for the 7.5 min as described. And bing! it worked. Wow. so amazing. I thought it was a gonner and was pretty close to considering paying the $300 for the logic board replacement by a 3rd party company. Thanks so much for posting this. Seriously. Thanks .
Dear Russell, you are my hero!
My MacBook was diagnosed dead (broken logicsboard, 1000$ repair cost) by the local apple repair center last week.
Even though my symptoms were kind of different (laptop started up but always froze during the start up process only displaying the apple and a non turning progress wheel) I gave it a try. AND IT WORKED!
(Actually I have to admit that I had to reassemble it twice as during the first reassembly i didn’t plug in some a connector firm enough)
Still thank you very very much for posting this!
And by the way ifixit is a great source concerning how to get the logicsboard out.
Best wishes,
Svenja
Hi to all the bakers that actually put their logic board in the oven. i myself did it twice. yesterday my macbook went black again. i thought, back to that oven… but for me after a bake, my mac must have its battery drained and recharged for it to work… so to i decided to skip the bake… and you know what? it worked. my mac is back.
I’m amazed that my solution is so simple. for now it only worked once so i’m not sure if its a real solution, but one can only hope…
My macbook is a 2007 15″ 2.2Ghz santa rosa 8600GT.
Hope this helps someone.
I just did this to my dead MacBookPro 3,1 – Resurrected! Thanks so much for this article. Lifesaver! All the best from Sarasota, FL.
Brilliant write up! My MBP8.2 (board p/n 820-2915-b with AMD 6750M) was refusing to boot, mad display artifacts and locking up to a blank grey screen just after the apple logo. Impossible to safe boot or boot from disk. Multiple PRAM and SMC resets had no effect. So… into the furnace she went, 8 minutes at 190C, new thermal paste and it has been running like a top!! Thank you!!!!! I was just ready to throw it off my roof when I stumbled onto your article 🙂
I had no doubt in my mind that this would work for my problem, and it did!
Thanks, I’ve been in IT for 20+ years and this beats putting hard drives in the freezer in the early 90’s.
IT WORKED
I am so thankful for this post… I literally thought I was up ** creek without paddle, but I got over my fears of taking computers apart, bought a multi-tool to get the star-looking screws, and went to town.
7 minutes at 375 later, I somehow put it all back together and seemingly plugged everything in, because I am cruising. It’s my girlfriend’s computer… she’s going to be stoked!
Thank you so much for this guide. I really didn’t think it was going to work… but it did anyway. Heck yeah.
Well, it happened again! I did this fix in mid-Sept. and today same problem. Did this fix again and I’m typing this on the repaired MacBookPro3,1
This time I was super careful with the thermal paste. I did a thorough cleaning of the logic board and the pipes. I made a very thin layer of paste on the chips. Reassembled, and here I am. Hopefully being careful with this will make the fix last longer than 18 days!
Thanks again!
hi
thnx for this i am gonna to try it but what did u put underneath?
What if all components fall ??
i followed your instructions and baked my macbook pro yesterday. i laughed out loud when it turned on after baking 🙂 …. thanks for the recipe, much appreciated.
oh and F U apple!
2008 MBP dead for a couple of months – went dead after sleep and refused to turn on and ‘failed’ Apple Store Nvidia test.
Cannot believe this worked! I followed advice on properly removing and reapplying thermal paste (i used an artic 5 kit) so hoping I don’t have to re-bake.
Thanks for publishing this article, such a steampunk approach to computer geekery!
After many months of doubts yesterday my son and I backed the logic board of a 2007 MacBook pro we got from friends just to see if there was a way to repair it. Right now Snow leopard is being installed on it. THe only thing we found out is the display has troubles with the light that need to be fixed. But the MacBook is at least running again.
..had exact same symptoms, exact same conclusion. your post convinced me to attempt and MBP has been good as gold for over 200 days; just failed again, but after much longer than expected. Baking again when new thermal paste arrives.
Have posted a link to this article on my own site (as below), so hope you’re OK with that?
cheers, Nick
https://f9-design.com/wordpress/2012/10/18/macbook-pro-logic-board-190dec-c-for-7-5-mins/
Thanks so much for the article! I just revived my wife’s Macbook! Your tips definitely helped make the process a little easier!
All I can say is WOW and Thank You
After battles with apple and them telling me I pretty much need to either buy a new computer or pay $500 for the repair I thought, what the hell, I have nothing to lose.
Did exactly as instructed and it worked like a charm. I was very doubtful but I must say it does work.
Thanks very much for this.
Hi Russell,
Just want to thank You for a great instruction on this mac awakening procedure.
Followed all of the steps and my Mac is alive again.
Recently decided to upgrade RAM and SSD replacing old DVD drive with an original HDD
Praying it will last for a while.
Thanks again
Your Baking Recipe just AWESOME!!! God Bless You!!
This is really cool, I thought “this guy must be crazy” but I ‘baked’ my MacBook Pro today after using it as an 2000 euro platter to serve coffee for a week or two….. it magically worked, 7:30 @ 190 deg C. hahaha, it really works again. Called to the Apple Store in Amsterdam, they simply do not believe my story after diagnosing my laptop as scrap :). Thanks a lot, now lets see how long it will keep working (i did use cooling paste this first time so I guess it will last for at least a month or six).
Regards from the Netherlands,
Jelmer